Showing posts with label Sewing: Toddler. Show all posts

Tuesday, November 7, 2017

Homemade Rapunzel Dress and Wig Costume

Sienna was C-3PO for our Stars Wars Droids family Halloween costume.  But if you asked her, she was "the Golden Guy", or if pressed to name him, C-Creepy-O.  Sooo, I made her a different costume to wear to school.  And also as an excuse to make her a Rapunzel dress-up.


Peasant dress pattern: Simplicity 2377 (Minnie Mouse dress)


I made the dress much longer than the Minnie Mouse dress, and in a bigger size, but it's pretty much the same. The light purple pattern has hearts traced all over it, a cute little detail.


As for the hair, I estimate the yarn cuts to be about 9 feet long.  I'm guessing you'd need 12 feet strands to make a floor length one.  Sienna is about 44 inches tall.  It's a lot of yarn.

She loved wearing it for Halloween, and she loves dressing up in it after school most days.  Bonus: It was probably less than $5 to make.  And it's the same yarn I used for the C-3PO hat.

Tuesday, September 8, 2015

Minnie Mouse Dress

The Minnie Mouse dress is the second in what I hope will be a collection of princess peasant dresses for Sienna. The Rapunzel one was knit and didn't turn out nearly as well, so I've put off the knit Briar Rose one I bought material for. But the Minnie one turned out perfectly.

I bought a new pattern for this, in a larger size, otherwise I would have used my standby (Simplicity 5695).
This is Simplicity 2377. It's basically exactly the same.

And why make one when you can make two for twice the price? I sold the other to a friend.


My kid is adorable.


Here's the knit Rapunzel dress.


I also made a couple sparkly Elsa capes. I basically hemmed a rectangle of fabric and put some FOE at the neck.


Monday, June 16, 2014

Sienna's Flower Girl Dress (Simplicity 5695)

I made Sienna's flower girl dress in 2 hours back in March and let it sit while I did all the other sewing.

The pattern is Simplicity 5695, which I have made several times (notably the Lucy Dress and the dress Maggie wore her 3rd Christmas). It's quick and easy. She likes it!


The dress needed some pouf. Maggie is wearing a poufy slip in the Christmas dress pictures, but I don't know what happened to it. So I freehanded a slip and then added a folded, gathered strip of petticoat net around the waist. And a snap at the back of the neckline to hold it up, haha!


Pouf!


The wide sash I tried originally looked terrible.


So I cut it off and we went with a strip like a ribbon.

The hem is a rolled hem, because I think rolled hems are awesome.


The sewn on sash didn't help make the dress cinch around her waist, so I ended up sewing little seams at each side to make it smaller. And a bow to match Maggie's! It's the same size, using Simplicity 4647.


Monday, July 2, 2012

4th of July Twirly Skirt


I made Maggie this festive skirt for the 4th of July. It took less than half an hour (not including finding the nearest Jo-Ann).  I posted a mini-tutorial at Mommysavers: Easy 4th of July Twirly Skirt

Tuesday, August 30, 2011

Upcycle By Hand: Pants to Pants

Dalton Boy is sorely in need of new pants. He grew out of the ones he was wearing when we came, but not into the hand me downs we brought. I took a pair of my khakis that had a rip and used them to make some pants for him. Here he is modeling them with a 9-12 month onesie. Hmm. Perhaps this is why the hand me downs don't fit.

I made a casing for 1 inch elastic only to find that I used most of it on Maggie's Halloween costume. I had to make due with 1/4", so he's got a little ruffle around the waist.

But you can't tell when he wears a t-shirt!

Cheese! Yes, I sewed these entirely by hand. Yay me.

Friday, February 25, 2011

Maggie-Size Apron

We cook from scratch a lot in India and Maggie and I were both in need of an apron to save us from flour splatters. I also wanted something for Maggie for semi-messy crafts (clearly this apron will not protect from serious paint spills!) I just heard about U-Create's Create With Me, so I was checking for the February challenge to be posted - what do you know, a good excuse to finally make our aprons. Ta dum!
Here's the tutorial. I don't have a sewing machine, and the fabric options are pretty limited here. Also they wouldn't sell me less than 1 meter, so I picked a trim fabric that would match both of our aprons. I cut all the pieces ahead of time, and headed over to Kerri's for a few hours of stealing her sewing machine. The kids didn't mind - they love having new toys to play with!
I cut out my apron pieces first, and it was so many pieces that I decided to simplify it for Maggie. I just eyeballed an apron shape, then cut out the ruffle, ties, and pocket. I think the neckband in the pattern is too wide, even folded in half. I added elastic in the top of the pocket and I just love the girly ruffle. The apron is so darling on her, and she is thrilled to wear it.

And, despite the face, someone else loves it, too. Dalton begged to wear the apron after Maggie. You hear that, teenage boy? You were asking to wear it! I didn't make you! Next time I go to Commercial Street, I'll look for some boy fabric (not hopeful about this) and make another one.
I only got halfway done sewing my apron and haven't made it back to Kerri's, so I'll share it another time. Mine has an elastic pocket as well (slightly crooked, but nevermind).
Update: Here's mine. It does the job.

Friday, November 19, 2010

Toddler Hats

I realized a few weeks ago that Maggie had grown out of her winter hat. So, I called my sister-in-law's mom, dropped off some yarn, and she crocheted her one.
Yes, I know how to crochet. Basically, I didn't feel like it. Cost: under $3 for the yarn, and enough leftover to make another.And, I realized yesterday that Maggie grew out of her summer hat and needs one fore India. So, like a real woman, I popped by Jo-Ann and made her one.
I used a pattern from Sew Much Ado and enlarged it by adding 3/8" to the sides of each pattern and around the crown piece. It's a little big for Maggie, and I think it's too deep, but I didn't add anything to the depth. Oh well. I couldn't get the brim pattern piece to fit on 1/4 yard fabric and had to piece the brim together. I recommend getting 1/3 yard to give yourself some leeway. Cost: just over $3.
My model had a terrific time playing in the leaves. She picked out the dinosaur fabric and loves it. The hat is reversible. I don't usually care about "gender specific" stuff but this screamed BOY to me, so the blue will go on the outside. Odd that I tell you that with pictures of my girl all dressed in pink, but in my defense they're hand-me-downs.

Saturday, September 4, 2010

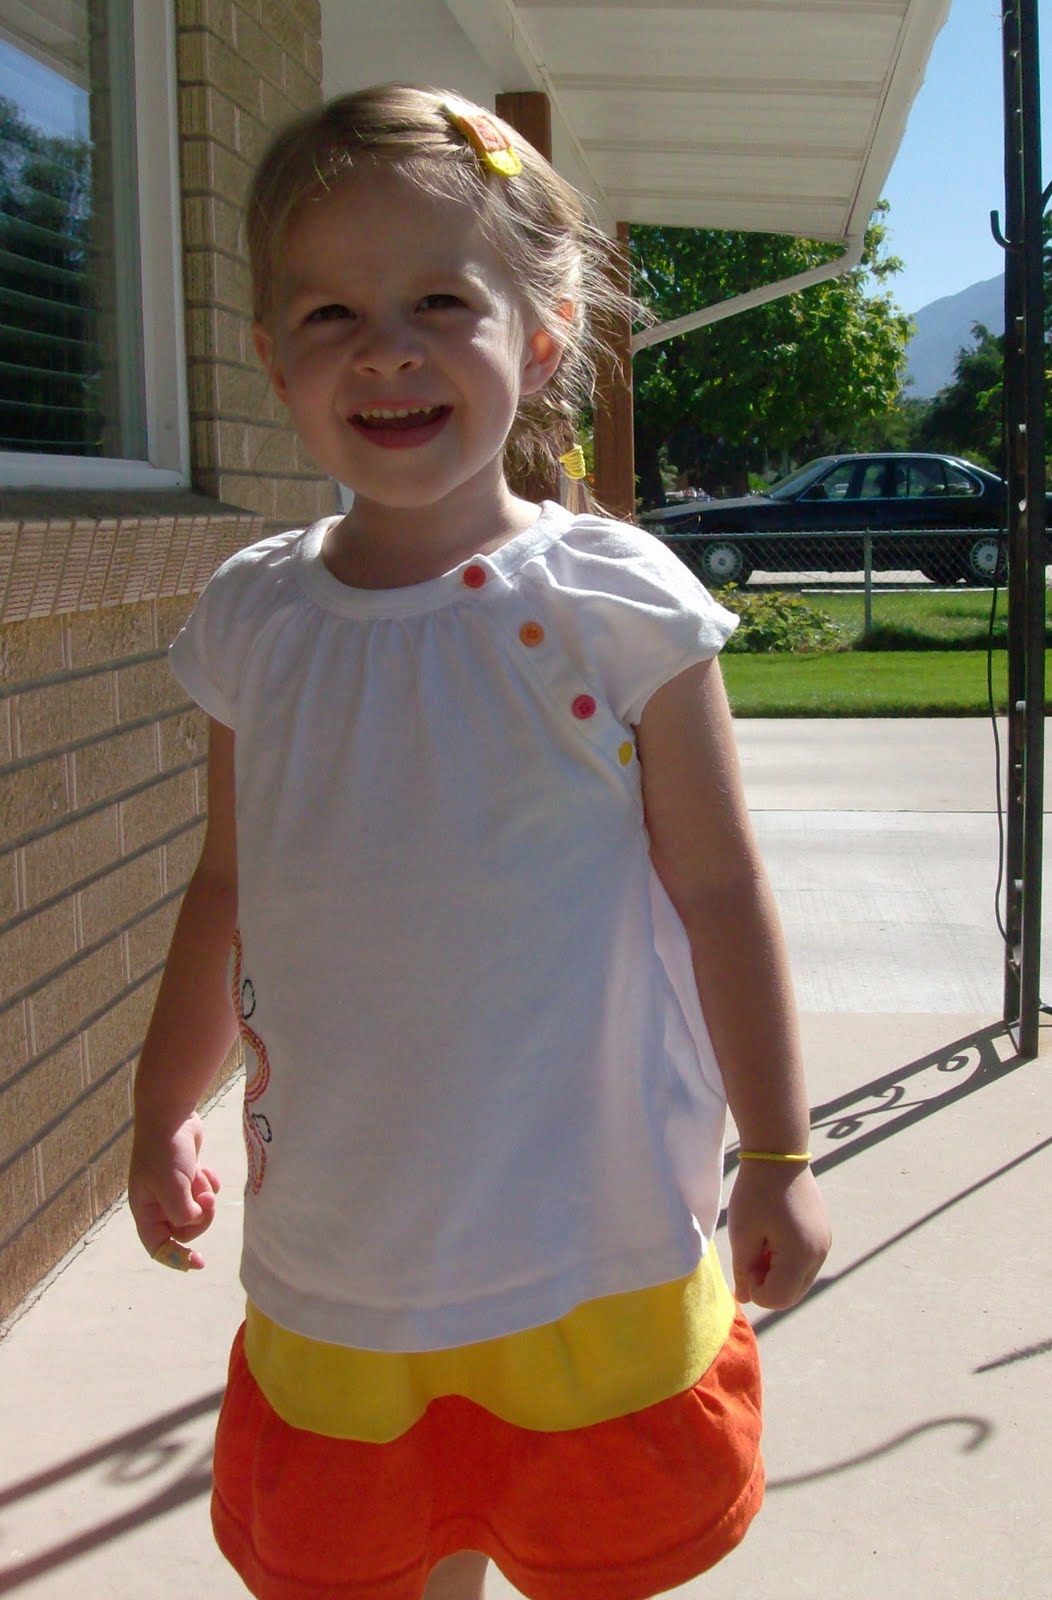
Dollar Store Craft: Candy Corn T-shirt Skirt

How cute is Maggie in her candy corn skirt (and candy corn clippie), made from t-shirts from the dollar store? We already had the orange adult t-shirt, so the skirt cost me $2, 45 minutes, and a bit of elastic. And it was very easy to make.
One of the great things about sewing with t-shirts is that knit fabric doesn't fray. You don't have to serge or finish your inside edges, or hem the outside if you don't want to.
I used a skirt that currently fits to get an idea of how big to make the t-shirt skirt.
I cut a strip off the bottom of each t-shirt, adding 1/2 inch seam allowance for each seam, plus 1 inch for a waistband. I kept the hem on the bottom of the orange shirt, but trimmed off the others.
Since my strips were already tubes and already in descending width, I just needed to sew them together. This is another great thing about using t-shirts, especially since I had them in different sizes. Otherwise, piece together your strips into a tube the width you need.

To make a gathering stitch, use the longest stitch length you have and leave long thread tails. Do this along the top of the bottom layer (orange) and then pin it to the bottom of the middle layer (yellow) right sides together. While pinning, match the side seams (if any) and the centers of the front and back. Do this before gathering so your gathers will be evenly spaced. Then pull the gathering stitches up by pulling on the bobbin threads, until the fabric layers are the same width. Add additional pins to keep the gathers evenly spaced, then sew. I run the gathering stitches about 1/8 inch from the top, then sew the seam at about 1/4 inch so I can yank out the gathering stitches after sewing the seam. You can see more pictures and description of gathering in my bubble skirt tutu tutorial.
Repeat the gathering steps for the top and middle layers. Sew gathering stitches into the top of the middle layer and pin it to the bottom of the top layer (right sides together!) Pull up the gathers, pin again, then sew.

Finally, add an elastic waistband. With the skirt inside out, fold the top down 1/2 inch and tuck the end under. Stitch right along the bottom edge of the fold almost all the way around. Thread 1/4 inch elastic through the casing by attaching a safety pin to one end. Try the skirt on and pin the elastic where it fits well. Sew the elastic together, trim off excess and finish the casing. Hem the bottom of the skirt if desired.

Maggie LOVES this skirt and wouldn't take it off for me to take a picture. I had to finish the elastic after her bath - then she put it back on and wore it to bed over her pajamas!
This was really easy, quick, and inexpensive to make. So much so I made three more skirts in different sizes using the same t-shirts. Yes, I got 4 skirts out of three $1 t-shirts and a $1 pack of elastic.
And I got to make one in a teeny tiny size for this teeny tiny doll, my 2 month old niece Kyli. I literally used the t-shirt sleeves to make this one! Isn't she precious?
Here are Madeline and Colette trying on their new skirts.
Linked at: Craftaholics and Sew Much Ado.

Wednesday, June 16, 2010

Toddler Leash

I made a harness for Maggie. She doesn't run off, but I'm not taking any chances with 6.5 million other people. If I made another, it'd be much better. I did a lot of piecing together and I wish I'd done a cross-halter in the back. Oh well. It'll do the job.

Tuesday, June 1, 2010

Felt Car Playmat

Not much sewing going on around here (if you haven't heard, we are moving 8600 miles), but I finally finished a "car playplace" for Maggie. I made one a couple weeks ago for a baby shower, and then it took me a long time to get Maggie's done. This is why I don't sell the things I make - I get bored making more than 1 of anything.
It is just a felt playmat for her to play cars (and trains!) on, but I wanted it to be a little more interactive than just a road. So I added a mailbox and a little letter (thanks, Tasha!), train tracks with movable barriers (thanks, Rachel!) a tunnel, and a parking lot (thanks, John!). Originally, I'd planned on something she could hold in her lap (12x12) but it just wasn't big enough! Still, this is small and lightweight enough to take with us on the plane.
Inspiration for gas pump, carwash, pond and garage here. I got the shoelaces for the gas pumps 3/$1 at the dollar store.
Cozy Cone Motel (inspiration here)
It folds into thirds and rolls up with a tie sewn to the back. I might add a snap to the tie.
Here's the baby's. Not quite as fancy, but he got his name embroidered on it. I couldn't decide on a spot for Maggie's so it's still blank.