Showing posts with label Sewing: Accessories. Show all posts

Friday, September 8, 2017

30 Kids Activities Challenge

The challenge this summer was to do 30 kids activities that required effort from Mom.  I didn't quite make it, but we did lots of fun stuff, and crossed a few things off my list.

Water play and popsicles with the neighbors
 Paper plate donut craft

Animals out of foam pellets

Fairy Hike


Lightning McQueen folded out of paper
Big Air


Snow cones
Centennial Farm
Family Love activity from the Friend
Mini Lego Pokemon
Chick Fil A cow appreciation day
7-11 free Slurpees
Adventure Playgrounnd


Mousetrap
Limeade with limes from Aunt Pat's house
Unicorn Milkshake

Beach mandalas
Chalk Games and Art


Making Jello with Sienna
OC Zoo


Sea foam recipe (1/3 c. dish soap, 1/3 c. water, 1 T. cornstarch, whisked in mixer.)


Fairy houses at the cabin


Paper plate rainbow twirlers
Pokemon pillows

Harry Potter wand (hot glue around sticks, pencils, chop sticks, then painted)


Chalk city


Making cookies with Maggie
Book chain


Saturday, January 25, 2014

Bow Clutch Evening Bag

I made something. I needed a nice little bag to use at the wedding last weekend, so I whipped up this clutch with some fancy fabric Dalton helped me pick out. It's shinier and prettier in real life.


I used this free tutorial for a bow clutch.  I wish I'd topstitched around the zipper before sewing the bag together, but oh well. It probably won't get much more use.

Monday, October 8, 2012

Big Purse/Mini Diaper Bag

I've wanted a bigger purse for a while now, something that holds a water bottle in addition to everything else, basically.  Of course, I had to make one, because I couldn't find one. I ordered the dandelion fabric from fabric.com after thinking it over for a month.  It's canvas, and I used heavy interfacing as well. I found the butter yellow polka dots at Jo-ann for the lining - just what I was looking for!  I used this basic sling bag tutorial, but I didn't measure. I just made a pattern from newspaper that looked about the size I was looking for. I also added topstitching, which I don't think was mentioned in the tutorial.

I. Love. It.  It'll be perfect for times I don't want to haul a diaper bag around, but of course, still need to bring diapers. Because soon I will have a kid in diapers again.


Here's the inside!  I used a magnetic snap for the first time, and made a pocket to fit the iphone I don't have yet.


Maggie took this lovely picture of me modeling my new purse (and my baby belly - this is 34.5 weeks).


Tuesday, August 14, 2012

Hello Kitty Messenger Bag

I made something! No, really.  We were having a hard time finding a backpack we liked for Maggie, and John had the idea that a messenger bag would be easier for her to deal with.  So, I ended up making her one! She picked out the Hello Kitty fabric at Jo-Ann (it's actually flannel, which I somehow did NOT realize, but it worked fine).  I used black duckcloth for the bag exterior, with heavy stabilizer basted on.


I based the bag on this kid's messenger bag tutorial by Zaaberry, but I enlarged it so she can fit a folder inside - this is for Kindergarten, after all.  It looks huge on her, but the folder fits just right.


Here are the measurement changes I made:

Main bag pieces: 16x13 inches
Flap: 13.5x12 inches
Strap: 31 inches long


I used the Hello Kitty fabric on the inside, too. There's no pocket (I'll make her a little zippered pencil bag) but I did add velcro closures to the front of the bag and the flap.

Monday, May 9, 2011

Hand Stitching

Here are the embroidery projects I've done since teaching myself embroidery stitches a little while ago. The first is Rachel's birthday present. Looking at it now, far away and several months later, I'm very impressed with myself!
Here is the sampler I made. It's been sitting in my embroidery bag, since I made it, and once again, now that I see it I really like it! I will have to display it somehow.
Then, last night I embroidered this scripture bag for Maggie. The Relief Society made this for the Primary kids and I found an extra under my bed, so I made it for Maggie. She picked out the colors and John did the writing.

Then I put her name on the back.

Continuing the theme of embroidery+stuff from the US, we got some goodies from a co-worker of John's today. Maggie was super excited about it. Here's what we got:
Of all the things you think you'll miss...
Maggie was begging to have "black jelly beans" after dinner. We thought she meant the M&Ms, but she wanted the black beans!

Thursday, October 21, 2010

Halloween Crafts and Homemade Decorations

We have been crafting up a Halloween storm around here, but I've been sharing all my Halloween craft ideas over at Mommysavers. Here's a round-up and links to instructions if you're interested.
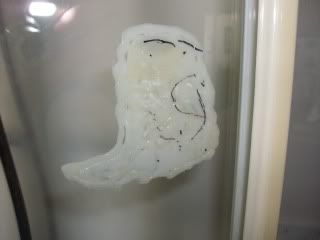
Hot Glue Ghost Window Clings I love the eyebrows Maggie always draws on her happy faces.
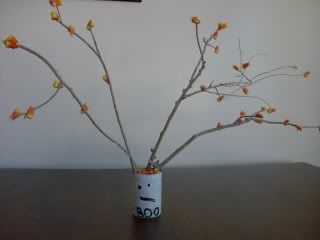
Ghost and Pumpkin tin cans...
which held the candy corn tree Maggie and Hannah made.
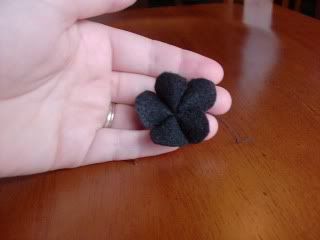
Instructions for easy felt flowers...
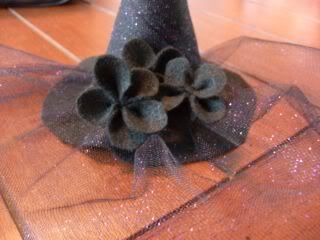
which I used on these mini witch hats! Jill and I saw these for $12 in a shop at Gardner Village and I said "I could do that for $1". In fact, I made 6 hats (one for myself, Jill, Susan, Rachel, Tasha, and Maggie) for $1.
You could also use the felt flowers on a decorative pillow cover. Jill and I each made one using bats.
How to make a costume tail. Details on the rest of Maggie's triceratops costume, and the other ones I made here.

Monday, June 14, 2010

Laptop Case and Camera Case

Some last minute projects before we move... Our pretty, new laptop needed a pretty, new case. I whipped one up similar to Rachel's, but I didn't use bias tape. I left a hole in the lining, sewed around the opening of the lining and outside fabric together, then turned and topstitched. It's not fabulous, but it works.
I also made a case for our new camera. I used fabric scraps for the outside, fleece scraps for the inside, bias tape scraps for the trim, and velcro scraps... are you seeing a trend? Again, I just guessed at the pattern and made a lining and a shell. I did boxed corners on the bottom. Then I inserted them right sides together and trimmed with bias tape. I made a [crooked and messy] button hole for the camera strap. I also sewed tiny seams along the outside edges to help it hold its shape a little more. If I hadn't had to redo the bias tape, it would actually be really cute!
By the way, I discovered the problem with bias tape isn't me - it's the tape! This turquoise tape is so thin, I could barely use it for one layer of fabric and one layer of fleece. I don't know how I used it for all the layers of fabric and batting of Rachel's laptop case. The bias tape I used for the DVD player tote was much easier to use.

Monday, March 15, 2010

Portable DVD Player Tote

Maggie got her own DVD player for her birthday - and by "birthday" I mean "upcoming 4 hour car rides, 17 hour plane ride, and countless 'Mommy's making dinner upstairs and the TV is as far away from the kitchen as possible' times". I loosely used this tutorial from Make It and Love It.
Maggie picked out the fabric (she choose pink, then I gave her 3 options). I know I said I wouldn't work with bias tape again, but it was so tempting. It turned out better this time, and my main problem was actually with the bobbin, not the tape, so hurray. I used fleece to line it instead of using batting and a lining.It holds our 7" player and a DVD or two, plus a pleated pocket for the power cord and car charger.

Tuesday, August 25, 2009

Non Purse

My purse has started to unravel a bit at one seam. As I thought about fixing or replacing it, I remembered that I didn't really use a purse when Maggie was a baby because of having to haul a diaper bag everywhere. So instead, I made a little zippered pouch with a cell phone pocket.
I got the fabric in the remnant bin for about 60% off, and it even coordinates with my diaper bag. The lining is the same muslin scraps I've been using for everything lately.

I made the strap from a 1x10" strip, ironed into fourths with the ends inside so I wouldn't have to turn a tube.

The cell phone pocket is what I love about the purse I made. I made this pocket the same way, by sewing together rectangles of the lining and outer fabrics on three sides, then turning it right side out, tucking the top in, and top stitching the top. Then I topstitched the three sides to the lining before sewing it together.
Just the right size for non-baby things that need to be brought.Here are some helpful tutorials:
twelve 22 zipper tutorial
bored and crafty zipper bag
skip to my lou lined zipper bag (I didn't use this one, but the bag was cute)

Thursday, April 23, 2009

Laptop Case

Rachel finally got her birthday present so now I can post about it. I made this laptop case for her using this whip-up tutorial and stamp/letter fabric Rachel picked out online. This was my first attempt at using bias tape and I am NOT doing it again. Well, maybe as a last resort. I had a really difficult time with it and it doesn't look very good up close.

But, the good news is, it fits and Rachel loves it. And that's what matters!